MFA Thesis - Shot 5
MFA THESIS
5/10/20252 min read
Shot 5 - Reference


Shot 5 - Final Render and Breakdown
Shot 5 - High Res Still
Shot 5 - Destruction
Model Preparation for Destruction
Prepare the model before destruction, making sure all geometry is finalized with no intersections.
Details(Layers)
Window glass
Window frame - wood
Rebar - metal
Wall - concrete
Wire
Debris
Pyro / Fire
Particles
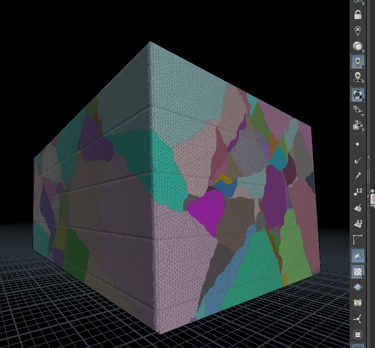
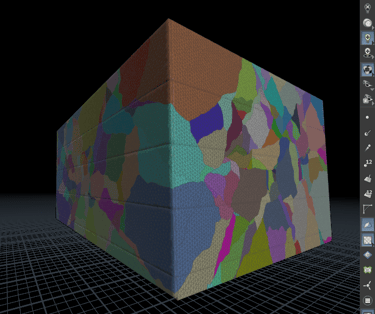
Fracture - voronoi & boolean
Boolean
more organic shape but not stable with complex geo

voronoi
the shape of fracture too uniform
Fracture - building a custom HDA for different layers of fractures
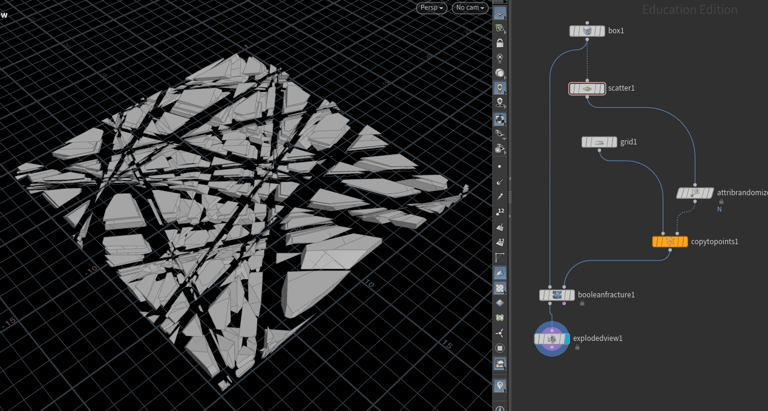
After preparing the proper model for destruction, I blasted the parts that I would not simulate to save rendering time. I then used a hard-edged group in the Remesh node to maintain the original building shape. After that, I created a subnet and used my custom HDA to create the fracture.
In the subnet, before feeding the geometry into the PointVOP, I set v@rest = v@P to preserve the original position of the points. In the PointVOP, I added noise to @P and then fed it into a Voronoi Fracture using points generated from a Scatter node. For the volume, after converting the polygon to VDB, I used a Volume VOP to add noise to the density, making the scattered points look more organic.
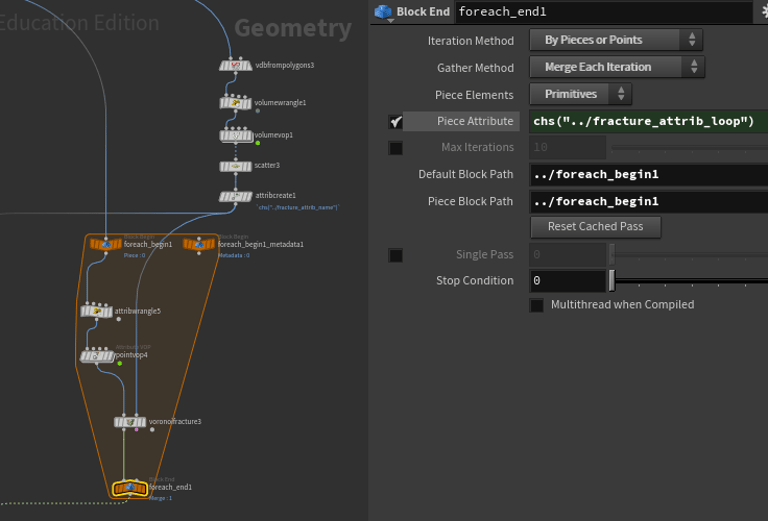
After creating the geometry, I used a For-Each loop to get the individual pieces and fed them into another Voronoi Fracture. I added a Switch node, which is connected to the parameter at the top level, allowing me to switch between the large piece and the fractured pieces from the For-Each loop. Afterward, I restored the original point positions by setting v@P = v@rest.
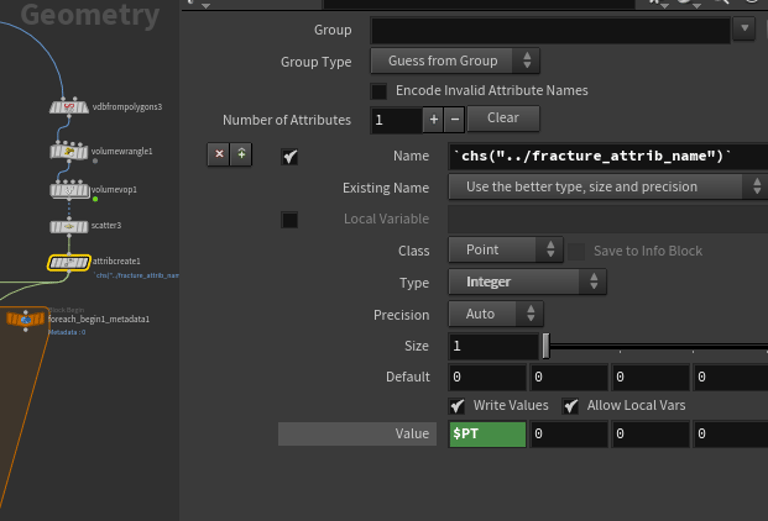
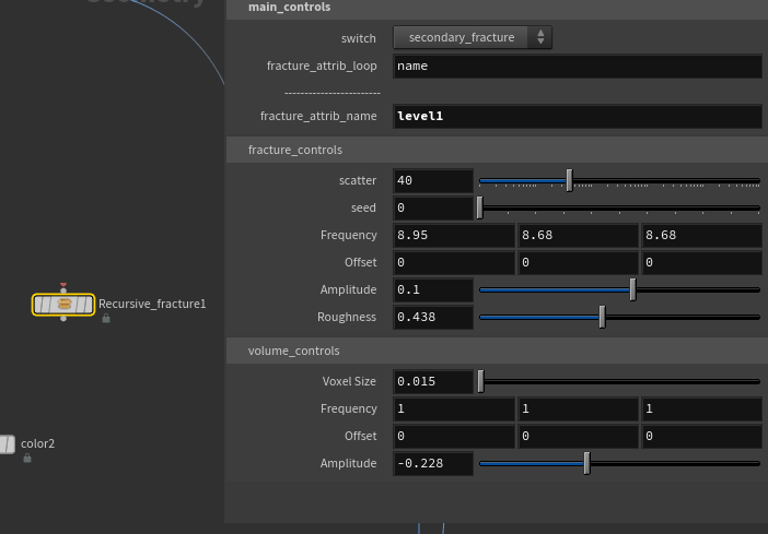
The reason I used an HDA is that I wanted to create multiple levels of fractures and control each level individually, as well as create interesting edges for the fractures. Since using the name attribute would cause overlaps, I created a new attribute after the Scatter node. This new attribute is then passed through the For-Each loop, where it gets used in each iteration. To make the setup more manageable, I added parameters at the top level, allowing me to control them easily.
There are a few places to connect to make the parameters work correctly:
Connect the name attribute from the Create Attribute node to the fracture_name attribute at the top level. (last attribute to be run in for each)
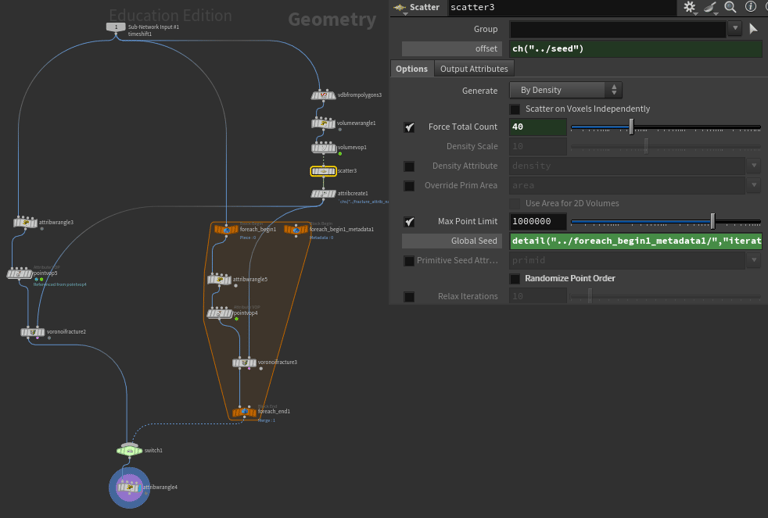
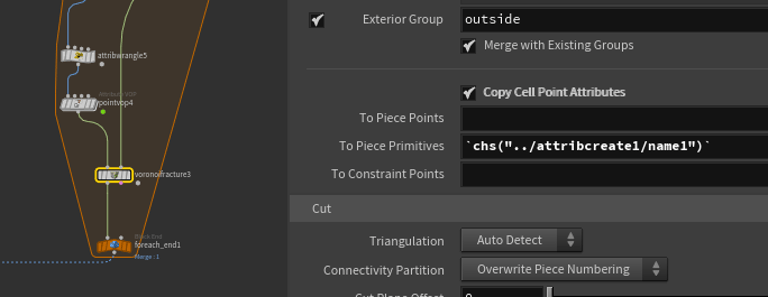
In the Voronoi Fracture, link the name attribute to the piece primitives instead of the points.
For the For-Each End, the piece attribute should be set up to fracture_loop. (new attribute)
Be sure to promote all the attributes you will use and connect them to the parameters at the top level.
Finally, back at the SOP level, right-click the subnet and choose "Create Digital Asset" to complete the process.
scatter
create attribute
for each end
voronoi
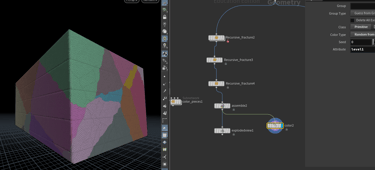
fracture level 1
fracture level 2
fracture level 3